Configuring for TIFF Generation
In order to generate .TIFF files from Zen reports, the FOP rendering engine provided with Caché must have access to Java Advanced Imaging tools (JAI). You can provide access by placing the required Java archive (JAR) file in the fop/lib subdirectory below the Caché installation directory. The following steps describe this process in detail.
-
Download the JAI distribution file.
Go to the following link:
https://www.oracle.com/technetwork/java/javasebusiness/downloads/java-archive-downloads-java-client-419417.html#jaiio-1.0_01-oth-JPROpens in a new tabOpens in a new tab
This page provides downloads for a number of Java client technologies, including Java Advanced Imaging at a number of revision levels. You must select version 1.0_01. More recent versions are not compatible with Zen reports TIFF generation. For Linux systems, download the CLASSPATH archive file appropriate for your operating system. A later item in this list discusses Windows systems. The following figure shows the correct download selection for Linux.
Download the JAI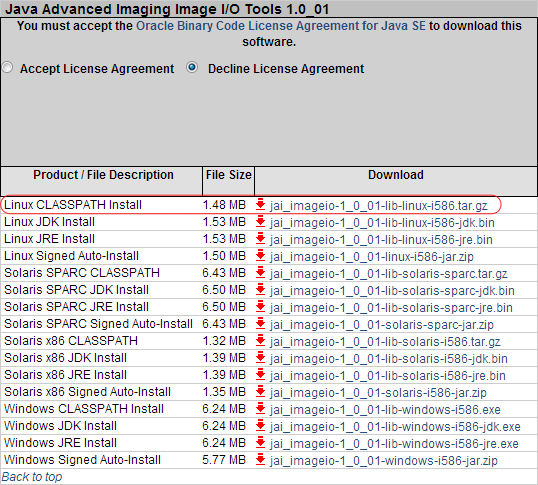
-
The downloaded file is a .tar.gz archive file. Expand the file and extract the jai_imageio.jar file, which is located in the lib subdirectory.
-
Copy the jai_imageio.jar file to the fop/lib subdirectory below the Caché installation directory.
-
If you are configuring a Windows system, you can also extract the required JAR file from a Linux CLASSPATH archive file. Download and expand the file, and extract the jai_imageio.jar file. Utilities such as 7–zip enable you to expand and extract files from .tar.gz archive files on Windows systems. You can download 7–zip from www.7–zip.orgOpens in a new tab. Just as for Linux systems, copy the jai_imageio.jar file to the fop/lib subdirectory below the Caché installation directory.