Creating and Testing Proxy Classes using the Terminal
In addition to using the Web Services Client Wizard, you can also create the proxy classes with the Terminal and the %SOAP.WSDL.ReaderOpens in a new tab class.
-
Open the Terminal. It does not matter which namespace you use. To make the example slightly more realistic, you might want to use a different namespace than the one containing your service code.
-
Assign the URL of the Web Service producer's WSDL document to a variable.
SAMPLES> Set wsdl="http://localhost:57772/csp/user/SOAPTutorial.SOAPService
.cls?WSDL=1"
Note that in this example, the Caché Web Server port is 57772, which is the default. The port on your system might be different. Click the About link on the Management Portal to determine your system's port.
-
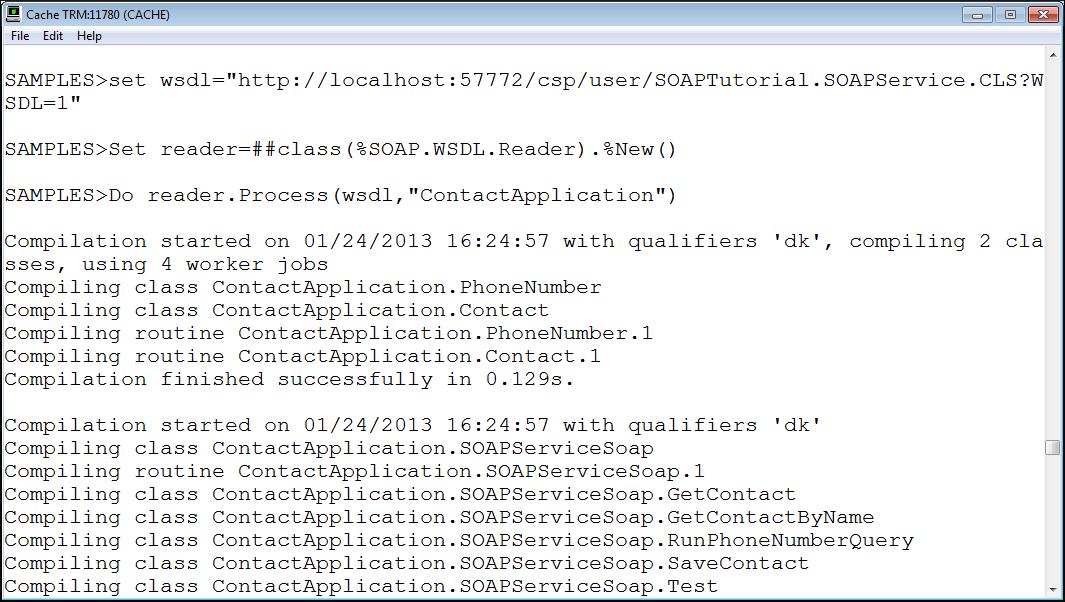
Create an instance of %SOAP.WSDL.ReaderOpens in a new tab and use its Process method to generate the proxy classes for the Web Service. Note that the second argument to Process controls the package name for the generated classes.
SAMPLES> Set reader=##class(%SOAP.WSDL.Reader).%New()
SAMPLES> Do reader.Process(wsdl,"ContactApplication")
Here is a screen capture of the terminal session:

-
Create an instance of the proxy class ContactApplicaiton.SOAPServiceSoap and test it.
SAMPLES> Set service = ##class(ContactApplication.SOAPServiceSoap).%New()
SAMPLES> Set contact = service.GetContact(1)
SAMPLES> Write contact.Name
Vanzetti,Dmitry W.
SAMPLES> Write contact.ContactType
Personal
If the CSP application containing the Web Service is password protected, then you must add a valid Caché user name and password to the WSDL url before generating the proxy classes. Do this by appending &CacheUserName=<user name>&CachePassword=<password> to the WSDL url.
In addition, you will need to create a SOAP Header to carry the username and password when you execute the Web Service. For information on how to do this, read Adding a Username Token in Securing Caché Web Services.