Package Options
This chapter discusses packages in more detail. Topics include:
When viewing this book online, use the preface of this book to quickly find other topics.
For persistent classes, the package is represented in SQL as an SQL schema. For details, see “Projection of Packages to Schemas,” later in this book.
When Caché encounters a reference to a class that does not include a package name and where the class name starts with “%”, Caché assumes the class is in the “%Library” package.
Overview of Packages
Caché supports packages, which group related classes within a specific database. Packages provide the following benefits:
-
They give developers an easier way to build larger applications and to share code with one another.
-
They make it easier to avoid name conflicts between classes.
-
They give a logical way to represent SQL schemas within the object dictionary in a clean, simple way: A package corresponds to a schema.
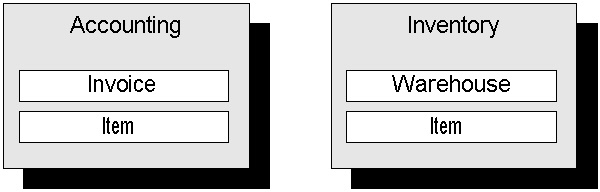
A package is simply a way to group related classes under a common name. For example, an application could have an “Accounting” system and an “Inventory” system. The classes that make up these applications could be organized into an “Accounting” package and an “Inventory” package:
Any of these classes can be referred to using their full name (which consists of package and class name):
 Do ##class(Accounting.Invoice).Method()
 Do ##class(Inventory.Item).Method()
If the package name can be determined from context (see below), then the package name can be omitted:
Do ##class(Invoice).Method()As with classes, a package definition exists within a Caché database. For information on mapping a package from a database to a namespace, see the section “Package Mapping.”
Package Names
A package name is a string. It may contain “.” (period) characters, but no other punctuation. Each period-delimited piece of the package name is a subpackage, and there can be multiple subpackages. If you give a class the name Test.Subtest.TestClass, then this indicates that the name of the package is Test, the name of the subpackage is Subtest, and the name of the class is TestClass.
There are several limitations on the length and usage of package names:
-
A package name is subject to a length limit. See “Classes” in Rules and Guidelines for Identifiers in the Caché Programming Orientation Guide.
-
Within a namespace, each package name must be unique without regards to case. Hence, there cannot be both “ABC” and “abc” packages in a namespace, and the “abc.def” package and subpackage are treated as part of the “ABC” package.
For general information on identifiers, see the section “Naming Conventions” in the chapter “Defining and Compiling Classes.”
Defining Packages
Packages are implied by the name of the classes. When you create a class, the package is automatically defined. Similarly, when the last class in a package is deleted, the package is also automatically deleted.
The following shows an example in which the package name is Accounting, the class name is Invoice, and the fully qualified class name is Accounting.Invoice:
Class Accounting.Invoice
{
}
Package Mapping
By definition, each package is part of a particular database. Frequently, each database is associated with a namespace, where the database and the namespace share a common name. This is the case for various system-supplied databases and namespaces, such as SAMPLES and USER. To make a package definition in a database available to a namespace not associated with that database, use package mapping. This procedure is described in more detail in the in the Caché System Administration Guide; the following is an introduction. The database containing the package is the source database and the namespace into which the package is being mapped as the target namespace. To map a package, the procedure is:
-
From the Management Portal home page, go to the Namespaces page (System Administration > Configuration > System Configuration > Namespaces).
-
On the Namespaces page, select the target namespace by clicking Package Mappings on that corresponding row in the table. This displays the Package Mappings page for the target namespace.
-
On the Package Mappings page, click New. This displays a dialog for setting up the mapping.
-
In this dialog, complete the fields as follows:
-
Package Database Location — The source database.
-
Package Name — The package being mapped. If you plan to map a package that has not yet been created, you can specify its name in advance by clicking Specify a New Package and entering the name of the package.
Click OK to use these values and dismiss the dialog.
-
-
The Package Mappings page should now display the mapping. Click Save Changes to save the mapping.
Mapping a package across namespace maps the package definition, not its data. Hence, mapping the Sample package from the SAMPLES namespace to the USER namespace does not make the instances of the Sample.PersonOpens in a new tab from the SAMPLES namespace available in the USER namespace.
When you map a package, be sure to identify all the code and data needed by the classes in that package, and ensure that all that code and data is available in all the target namespaces. The mapped classes could depend on the following items:
-
Include files
-
Routines
-
Other classes
-
Tables
-
Globals
Use additional routine, package, and global mappings as needed to ensure that these items are available in the target namespace. See “Add Global, Routine, and Package Mapping to a Namespace” in the chapter “Configuring Caché” in the Caché System Administration Guide.
When you map a package, the mapping applies to the class definitions in that package and to the generated routines, which are in the same package.
Mapping a Package Across Multiple Namespaces
Caché also provides functionality to make a source package available in multiple target namespaces through a single action. Such a mapping makes the package available in all namespaces except DOCBOOK and SAMPLES.
To make a package available to multiple namespaces, the procedure is:
-
Create a namespace called %ALL according the instructions in the “Create a Namespace” section of the “Configuring Caché” chapter of the Caché System Administration Guide.
-
Create a package mapping as described in this section and save it.
The classes in the mapped package are then visible and usable in the %SYS namespace, the USER namespace, and any user-defined namespaces.
Deleting the %ALL namespace removes its mappings.
Package Use When Referring to Classes
There are two ways to refer to classes:
-
Use the fully qualified name (that is, Package.Class). For example:
// create an instance of Lab.Patient Set patient = ##class(Lab.Patient).%New() -
Use the short class name and let the class compiler resolve which package it belongs to.
By default, when you use a short class name, Caché assumes that the class is either in the package of the class whose code you are using (if any), or in the %Library package, or in the User package.
If you want the compiler to search for classes in other packages, import those packages as described in the next section.
Note:It is an error to use a short class that is ambiguous; that is, if you have the same short class name in two or more packages and import all of them, you will get an error when the compiler attempts to resolve the package name. To avoid this error, use full names.
Importing Packages
When you import packages, Caché looks for any short class names in those packages. In a class definition, you can import a package via the class Import directive or the ObjectScript #IMPORT directive. This section explains these directives, discusses the effect on the User package and the effect on subclasses, and presents some tips.
Class Import Directive
You can include the class Import directive at the top of a class definition, before the Class line. The syntax for this directive is as follows:
Import packages

Class name {}
Where packages is either a single package or a comma-separated list of packages, enclosed in parentheses. The word Import is not case-sensitive, but is usually capitalized as shown here.
Remember that in a class context, the current package is always implicitly imported.
ObjectScript #IMPORT Directive
In ObjectScript method, an #IMPORT directive imports a package so that you can use short class names to refer to classes in it. The syntax for this directive is as follows:
#import packagename
Where packagename is the name of the package. The word #import is not case-sensitive. For example:
#import Lab
 // Next line will use %New method of Lab.Patient, if that exists
 Set patient = ##class(Patient).%New()
You can have multiple #IMPORT directives:
#import Lab
#import Accounting

 // Look for "Patient" within Lab & Accounting packages.
 Set pat = ##class(Patient).%New()

 // Look for "Invoice" within Lab & Accounting packages.
 Set inv = ##class(Invoice).%New()
The order of #IMPORT directives has no effect on how the compiler resolves short class names.
Explicit Package Import Affects Access to User Package
Once your code imports any packages explicitly, the User package is not automatically imported. If you need that package, you must import it explicitly as well. For example:
#import MyPackage
#import User
The reason for this logic is because there are cases where you may not want the User package to be imported.
Package Import and Inheritance
A class inherits any explicitly imported packages from the superclasses.
The name of a class is resolved in the context where it was first used and not with the current class name. For example, suppose you define in User.MyClass a method MyMethod() and then you create a MyPackage.MyClass class that inherits from User.MyClass and compile this. Caché compiles the inherited MyMethod() method in MyPackage.MyClass — but resolves any class names in this method in the context of User.MyClass (because this is where this method was defined).
Tips for Importing Packages
By importing packages, you can make more adaptable code. For example, you can create code such as:
#import Customer1
 Do ##class(Application).Run()
Now change App.MAC to:
#import Customer2
 Do ##class(Application).Run()
When you recompile App.MAC, you will be using the Customer2.Application class. Such code requires planning: you have to consider code compatibility as well as the effects on your storage structures.