Generating Proxy Classes
In order to use the CMP object interface, you must generate .NET proxy classes for the relevant Caché classes. Use CacheNetWizard.exe to do this. Double click the CacheNetWizard.exe icon to begin.
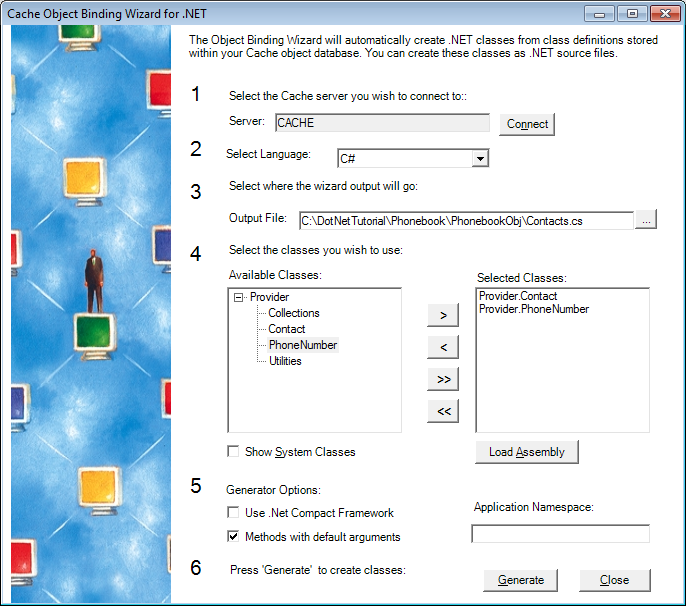
Here are the steps for using the Wizard:
-
Click Connect. The wizard displays the Cache Connection Manager. Select the server and namespace and click OK. If you are not sure which server to use, click the Caché Cube (in the systray) and note the setting for Preferred Server. Select the namespace in which you installed the Caché classes. Note that after clicking Connect, you may see an “Access Denied” error box. If you do, click Cancel and then proceed. You will be presented with a sequence of dialog boxes asking for connection information. The final box asks for your user name and password. On this dialog click the Remember Password box to avoid having to re-enter this information in the future.
-
Enter a name and location for the output file, for example Contacts.cs. For a location, choose the location of the other project source files.
-
In the Available Classes area, click on the name of each of the Caché classes for which you need proxies. Next, click on the arrow pointing to the right. The class name is displayed in the Selected Classes area.
-
Under Generator Options click Methods with default arguments.
-
Click Generate to generate the source files for the proxy classes.
After you generate the proxy classes, add them to your project by clicking Project –> Add Existing Item.
Note that is important that you regenerate the .NET proxy classes whenever you modify their corresponding Caché classes or move the classes to a different namespace. Failure to do this can lead to unpredictable results.
For more information on using CacheNetWizard.exe (as well as using dotnet_generator.exe), read Generating Caché Proxy Classes in the Using Caché Proxy Classes section of Using the Caché Managed Provider for .NET.
You can install CacheNetWizard.exe into the Visual Studio tools menu. See the Adding the Caché Object Binding Wizard to Visual Studio section of the Setting Up the Caché Managed Provider section Using the Caché Managed Provider for .NET for instructions.
See Examples and Exercises for the location of Contacts.xml.