Creating a Web Service Client
Using the WSDL for a Web Service, you can also create a Caché client for that service using the Studio SOAP client wizard. The basic steps are:
-
Create Caché proxy classes for the Web Service.
-
Use the proxy classes to invoke the Web Service.
The following example demonstrates how to use the Studio SOAP Client Wizard to generate proxy classes for the MVFILE.Services Web Service created in the previous example.
-
Open Studio and connect to any namespace. Note that you do not need to connect to the namespace containing the Web Service and the multivalue account.
-
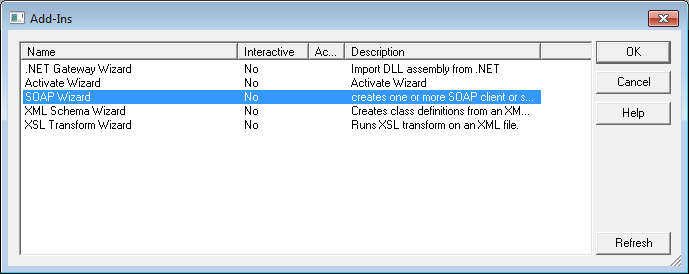
Click Tools—>Add-Ins—>Add-Ins on the Studio menu bar.
-
On the Add-Ins screen, click SOAP Client Wizard and then click OK.
-
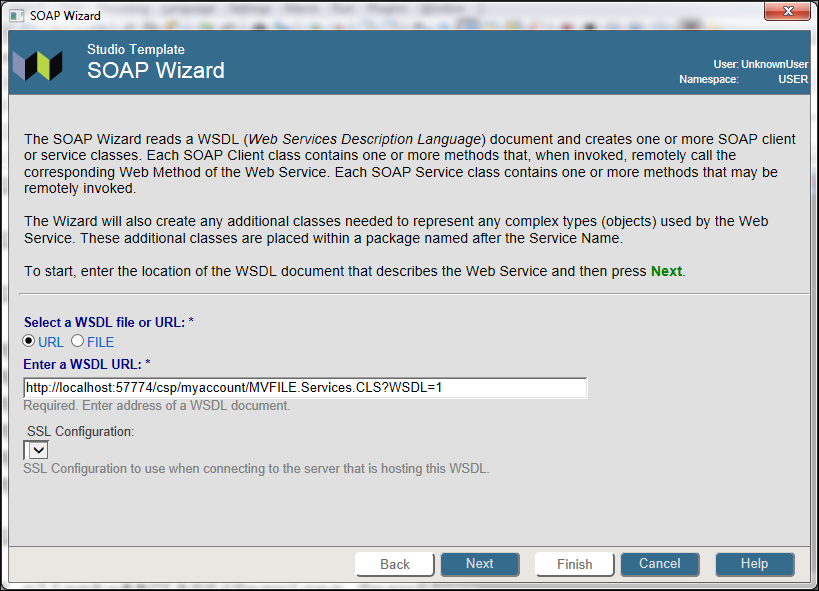
Click URL for the source of the WSDL (URL or File) and Enter the URL for the MVFILE.Services WSDL document into the WSDL URL box. Click Next.
-
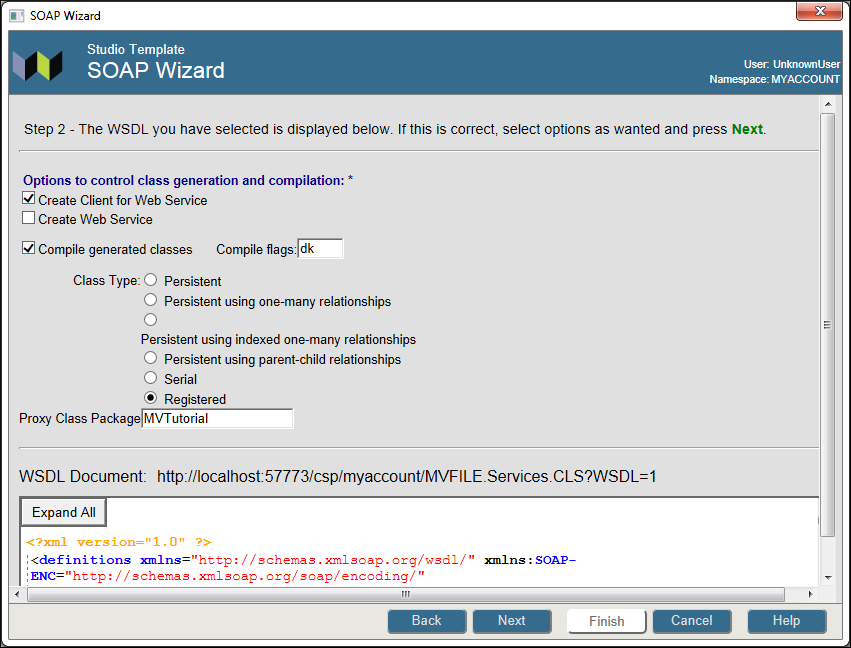
On the next screen, do the follwing:
-
Verify that Create Client for Web Service is selected.
-
Verify that Compile generated classes is selected.
-
Verify that Registered is selected for the Class Type.
-
Enter MVTutorial in the Proxy Class Package box.
-
Verify that the screen displays the WSDL for the Web Service.
-
Click Next.
-
-
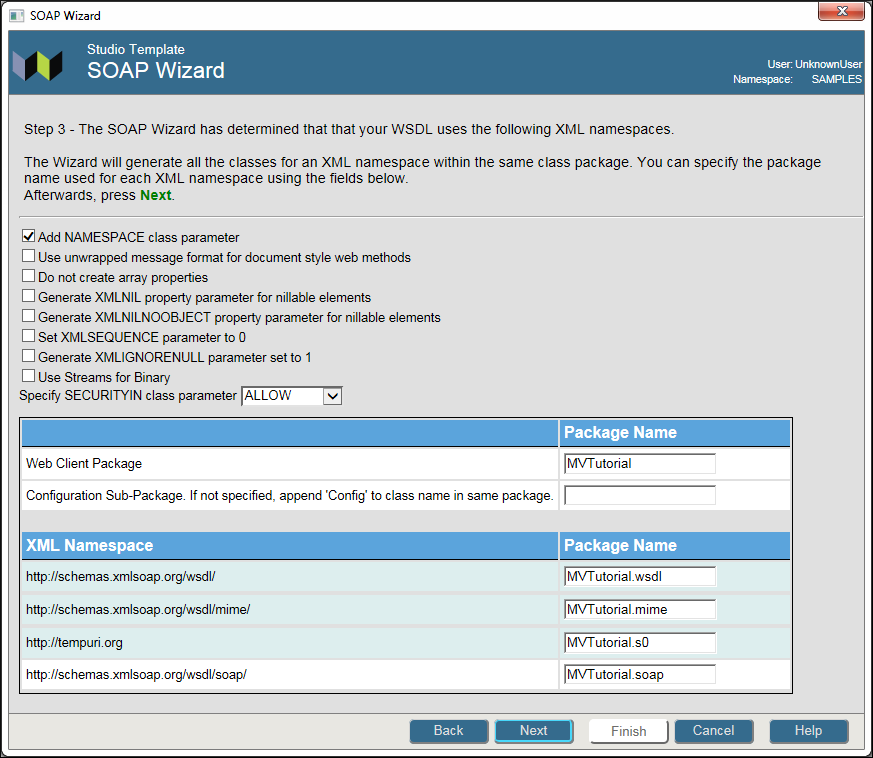
Notice the package name for the generated classes is MVTutorial. Click the Add NAMESPACE Class Parameter box. Click Next.
-
The SOAP Client Wizard generates proxy classes for the Web Service. Click Finish.
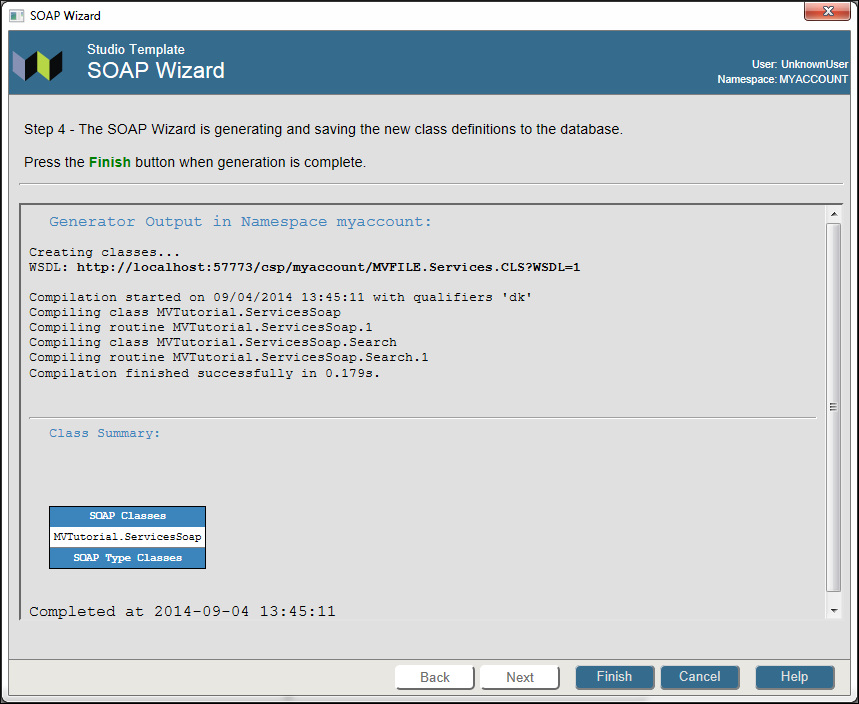
Note that the name of the generated proxy class is MVTutorial.ServicesSoap.
For more information on using the SOAP Client Wizard, read Using the SOAP Client Wizard in the Creating Web Clients section of Creating Web Services and Web Clients in Caché.