Creating a CSP Page
Here are the steps for creating a CSP page using Studio:
-
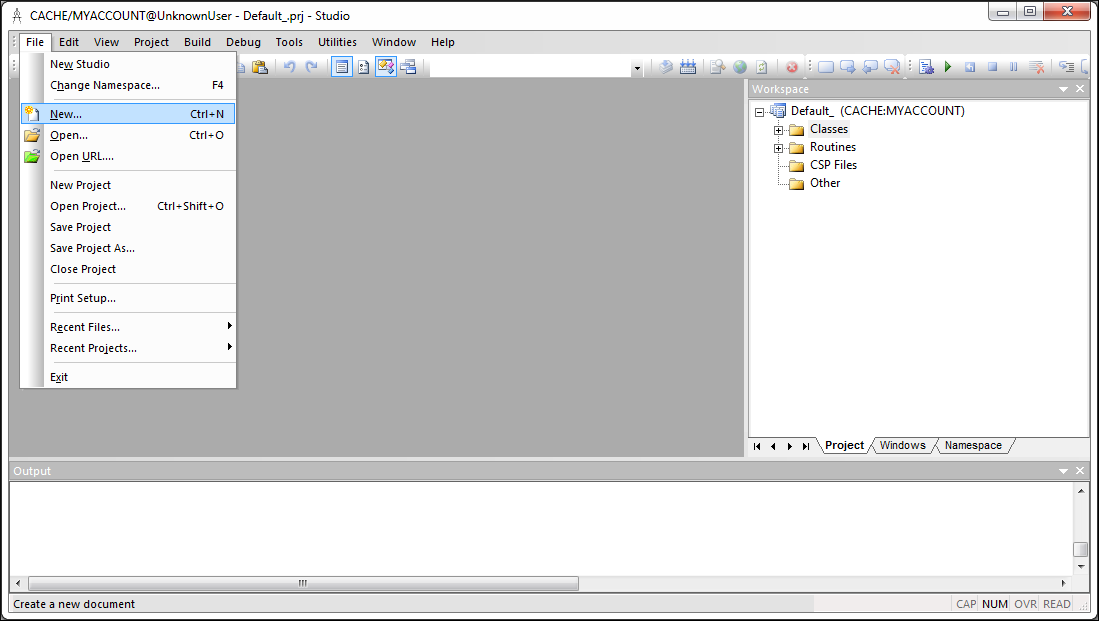
Open Studio. On the menu bar, click File–>Change Namespace. This displays the Caché Connection Manager dialog.

-
Click MYACCOUNT and then click OK. Studio is now connected to the MYACCOUNT namespace.
-
On the menu bar, click File–>New.
-
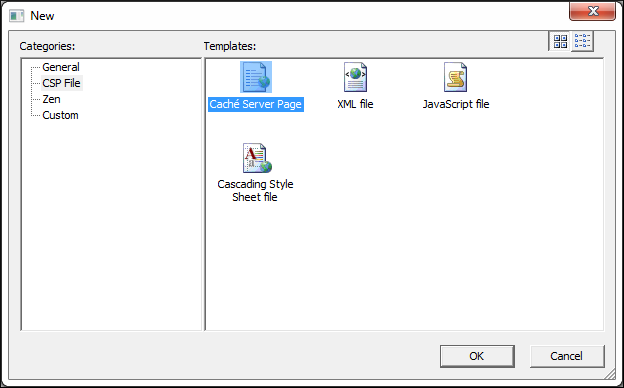
On the New dialog, click the CSP File tab. Click the Caché Server Page icon and then click OK.
-
The Studio Editor displays the new CSP page. Locate the area between the <body></body> tags. Replace the existing text “My Page Body” with the following HTML:
<h2>Welcome to CSP!</h2>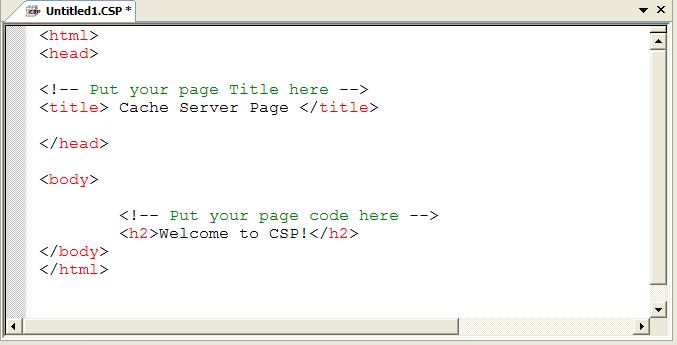
-
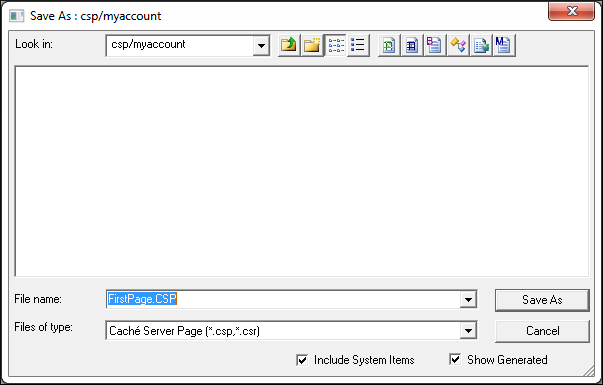
On the menu bar, click File–>Save and then click csp/user on the Save As dialog. Name the file FirstPage.CSP. Click Save As.
-
On the menu bar, click Build–>Compile to compile FirstPage.CSP.