Using Studio Templates
This chapter describes how to use Studio Templates.
Templates are a repeatable way to insert functionality into Studio editor windows. There are three types of templates:
-
Text Template—(what is meant by the word Template) A simple text template inserts generated text into a document. An interactive text templateincludes user input. An example would be a Studio template inserts a block of standard HTML into a CSP file. To access text templates, select Tools > Templates > Templates....
-
New Document Template—Creates a new document window in Studio.
New Document Templates constitute the list of new document types displayed by the File > New menu. To create a new document template, create either a simple or interactive text template with a Mode attribute of new.
-
Add-in Template—Creates a new tool in Studio. An Add-in Template differs from a Text Template in that it does not inject text into a document and does not require an open document.
Add-ins are available using Tools > Add-ins. For information on using the SOAP Web client wizard, see Creating Web Services and Web Clients in Caché. For information on using the XML Schema Wizard, see the appendix “Using the XML Schema Wizard” in Using XML with Caché.
Studio comes with a set of Caché-supplied standard Studio templates. In addition, you can create your own custom templates using CSP.
To ensure that Studio templates open quickly, disable the automatic detection of proxy settings in Internet Explorer.
-
Open Internet Explorer and select Tools > Internet Options and the Connections tab.
-
Select LAN Settings and uncheck any checked boxes. Make sure nothing on this page is checked and then select OK twice to close the Internet Options dialog.
Accessing Studio Templates
You can open a template using Tools > Templates, as well as with the right-click menu in the editor window. You can open a template by selecting it from the list of recently-used templates (showing on the right-walk menu under the word Templates...) or from the Studio Template list, accessed with (Tools > Templates > Templates), which lists available templates. Each template is associated with one or more document types; only templates associated with the current window's document type are shown in the Template list.
There are two styles of template; simple and interactive. A simple template inserts text at the cursor point with no further user interaction. An interactive template displays one or more screens soliciting additional information, like a wizard.
Any text that is highlighted when you open a template is replaced by the template. Many templates use the currently highlighted text as input to the template program.
Caché-Supplied Standard Studio Templates
Studio comes with a set of templates. You can see a list of all system-supplied templates in Studio in the %SYS namespace, Workspace window, Namespace tab, under CSP files. To see templates usable in the current document, use Tools > Templates > Templates. These templates are described below.
By default, Studio templates use a session timeout of 90 seconds. If you are entering data into a Studio template, the session ends after 90 seconds of no user input. For more information, see the section “Default Timeout” below.
Templates
This section contains three tables defining the templates available in Studio for use with CSP or Zen:
| Template | Description |
|---|---|
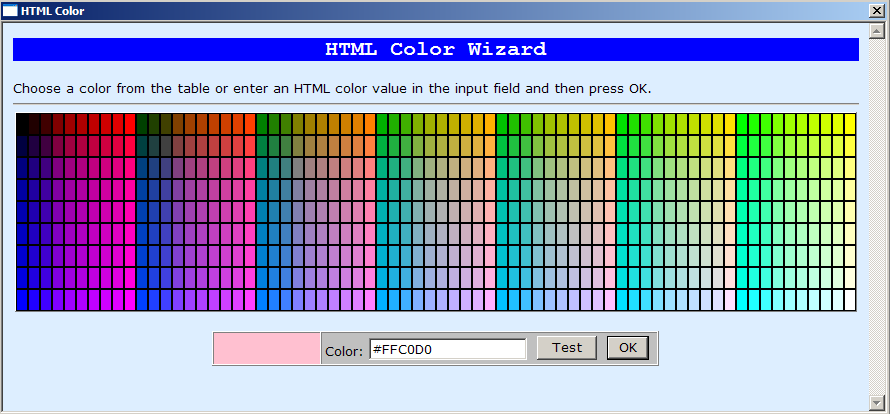
| HTML Color | Select to insert an HTML color value string (such as #F0F0F0) at the cursor point. |
| HTML Input | Select to insert an HTML input control at the cursor point. |
| HTML Script | Select to insert a <SCRIPT> tag at the cursor point, with the specified language and content. |
| HTML Table | Select to insert an HTML table at the cursor point with the specified characteristics. Select Preview to display a preview window. |
| HTML Tag | Select to insert an HTML tag at the cursor point, selected from a list with specified attributes. Or if you highlight an existing HTML tag and then invoke the template, you can edit the displayed attribute values. |
Class Definition Templates
Many of the CSP templates are available for use in class definitions (they can be useful in &html<> blocks). In addition, the following templates are available:
| Template | Description |
|---|---|
| SQL Statement | Select to insert code for a specified SQL Statement at the cursor point. Select Preview to see test results of the table (using data in the database) in a popup preview window. You can specify whether the template returns only the SQL text, an embedded SQL cursor based on the SQL text, or a %ResultSetOpens in a new tab object based on the SQL text. |
| Web Form Wizard | Select to open a Wizard with which you can create a CSP form, specifying class members and a table style for the form to use. |
Zen Templates
You can use the following wizards (also called templates) in Zen classes. For detailed information on using these wizards, see Zen Wizards in Using Zen and the chapters referenced in the table below for select templates.
| Template | Description |
|---|---|
| Zen Chart Template | Select to insert a Zen chart definition within an Xdata block of a ZenPage class, selecting type, style, and attributes. For more information see the chapter “Zen Charts” of Using Zen Components. |
| Zen Element Template | Select to insert a Zen element within an Xdata block of a ZenPage class. You can insert and edit built-in, custom, or composite Zen components or create a new Zen component. For more information, see the chapter “Zen Layout” in Using Zen. |
| Zen Method Template | Select to insert a method. The wizard lets you select a scope, either instance or class, a location where the method will execute, a name, and whether to add a try/catch error processing template. You can further edit it in the Studio editor. |
| Zen Style Template | Select to insert a CSS style declaration within an Xdata Style block of a Zen class. A table displays the CSS style declarations defined by Zen components. You can select one and override it within your page by editing details. For more information, see the chapter “Zen Style” in Using Zen. |
| Zen TablePane Template | Select to insert a new Zen tablePane definition within an Xdata block of a ZenPage class. Select the source of the query or table for this tablePane and then adjust properties as desired. For more information, see the chapter “Zen Style” in Using Zen. |
Add-In Templates
The Tools > Add-Ins menu contains a list of wizards with which you can add items to your project. The menu contains the following add-ins.
| Add-In | Function | For More Information |
|---|---|---|
| .Net Gateway Wizard | Imports a DLL assembly file from .NET and create a set of corresponding classes. | Using the Object Gateway for .NET |
| Activate Wizard | Creates Caché classes which provide you with access to COM objects from within Caché. | The Caché Activate Wizard in Using the Caché ActiveX Gateway |
| Java Gateway Wizard | Imports a class file or a jar file from Java and creates a set of corresponding classes. | Using the Java Gateway in the Ensemble documentation set |
| SOAP Wizard | Reads a WSDL (Web Services Description Language) document and creates one or more Web client classes or Web service classes. | Creating Web Services and Web Clients in Caché |
| XML Schema wizard | Reads an XML schema and creates a set of corresponding classes. | “Using the XML Schema Wizard” in Using XML with Caché. |
| XSL Translate Wizard | Transforms an XML file using a specified XSL stylesheet. | “Performing XSLT Transformations” in Using XML with Caché |
Making Your Own Studio Templates
You can create any of the following types of templates:
-
Simple Text Templates insert text at the current cursor location.
-
Interactive Text Templates provide an interactive dialog that request information and then insert text at the current cursor location.
-
Add-in Templates provide tools for general use in Studio.
-
New Document Templates appear in the Studio New Document dialog and create new documents.
You should have some familiarity with CSP development before attempting to create Studio templates.
Template Architecture
Studio Templates are created and implemented using Caché Server Pages (CSP); each template is one or more server pages that run on a Caché server. When you invoke a template, Studio creates a window containing a browser and makes an HTTP request (via the built-in Caché simple HTTP server) to the CSP page associated with the template. The CSP page can either:
-
Return HTML containing an interactive form that solicits additional input from the user, or
-
Return XML containing the text to be inserted at the cursor point in Studio. (All Text and New Document Templates do this as their final step; Simple Templates, with no user interface, implement only this step; Add-in Templates do not insert text into a document.)
To make it easier to develop templates, Caché includes a set of custom CSP tags that perform all the basic operations of templates. These tags are described in the following sections.
The power of templates comes from the fact that they are running on a Caché server and have the entire power of Caché at their disposal. Therefore, for example, templates can perform sophisticated database operations.
When invoking a template, Studio passes parameters to the server, where they are accessible, in the %request object. These parameters (which are case-sensitive) may include:
-
Project—name of the current Studio project.
-
Namespace—name of the namespace Studio is connected to.
-
User—name of the current Studio user.
-
Language —ObjectScript language mode.
-
Document Namespace—namespace the document belongs to (might be different from current namespace.
-
Name—name of the current document, if any.
-
Tabsize—Number of spaces a tab contains in the document.
-
SelectedText—selected text in the current document, if any.
Give each template a unique name (unless you are replacing an existing template with a new one).
Default Template Timeout
A session timeout is the amount of time in which a session stays open without any input from a user. At the end of this time of no user input, CSP closes the session.
Templates created in Studio are stored in either of the CSP applications, /isc/studio/usertemplates (which appear on the Tools > Templates menu) or /isc/studio/templates (which appear on the Tools > Templates > Templates menu). By default, both of these applications have default session timeouts of 90 seconds. In the Management Portal, on the CSP Application options page for each of these applications, you can enter a number in the Default Timeout setting, but the number has no effect on the hard-coded session timeout of 90 seconds. This is intentional to prevent inactive Studio templates from retaining system licenses.
Simple Text Templates
A simple template is a single CSP page that returns a block of text that is inserted into the current document at the cursor point. The CSP page contains the special Studio CSP tag: <csp:StudioSimpleTemplate>.
Creating a Simple Studio Template
To create a simple Studio template, start Studio and do the following:
-
Create a new CSP page with File > New > Caché Server Page.
-
Replace the contents of the document with the following. (The name of the new template is MyTemplate.)
<csp:StudioSimpleTemplate name="MyTemplate" type="CSP"> SOME TEXT! -
Save and compile this CSP document with Build > Compile. It does not matter what file name you use for the CSP document or which namespace or CSP application you store it in.
To make a Studio template accessible to all namespaces, save it in the %SYS namespace in /isc/studio/usertemplates.
You have now defined a template called MyTemplate (its name is specified by the name attribute of the <csp:StudioSimpleTemplate> tag). When you are in an open CSP page in the Studio Editor, select Tools > Templates > MyTemplate, and the text SOME TEXT! is inserted into the page.
The Template dialog lists templates whose type matches the document type from which you invoked the Template dialog. In our example, the MyTemplate template has a type of CSP. When you are in a CSP page in the Studio Editor, it appears on the Tools > Templates list.
You can also edit the type attribute, a comma-separated list of document types, to specify the document types the template can be called from. The list of types includes:
| Template Type | Template is available when your current document is a |
|---|---|
| CSP | CSP document |
| CSR | CSR document |
| MAC | MAC routine |
| INT | INT routine |
| INC | INC file |
| BAS | BASIC script |
| CLS | Class Definition document |
| MVB | MVBasic Routine |
Testing a Simple Studio Template
To test a simple text template:
-
Open an existing (or create a new) CSP page in Studio (you can use any CSP application directory). While you can continue to use the namespace in which you created the template, you probably want to connect to the namespace where you normally work.
-
Position the cursor in the CSP document editor window and select Tools > Template > Templates.
-
You see your new template in the list. Select it and select OK.
The body of the simple template is inserted at the cursor location. For example:
<html>
<body>
SOME TEXT!
</body>
</html>
Adding Logic to a Simple Studio Template
The real power of templates is that they can execute code. CSP page templates can include CSP features including:
-
Embedded expressions using #( )# syntax.
-
Line of code contained in a <script runat=”server”> tag.
For example, we could create a simple template that returns the current date and time (using the $ZDT function) in an HTML <B> (boldface) tag:
<csp:StudioSimpleTemplate name="Now" type="CSP">
<B>#($ZDT($H,3))#</B>
Troubleshooting a Simple Studio Template
If you have problems developing a custom template, one way to debug it is to view your template CSP page in a browser with View > Web Page while editing your CSP. Use a browser capable of displaying XML text; the value returned by a template is wrapped in XML.
For example, you can display the output of the template defined earlier in this section by entering a URL in a browser (or using File > Open URL), such as:
http://localhost:8972/csp/user/MyTemplate.csp
This results in the following XML response:
<?xml version="1.0"?>
<template>
<![CDATA[BODY##www.intersystems.com:template_delimiter##
 SOME TEXT!##www.intersystems.com:template_delimiter##]]>
</template>
The response is contained in a <template> element. The body of the response is delimited using the ##www.intersystems.com:template_delimiter## delimiter.
Interactive Studio Templates
An interactive template is a set of one or more CSP files that display a dialog window (using HTML) requesting user input. The interactive template's final page inserts a block of text into the current document at the cursor point, as a simple template does.
When you select an interactive template, Studio displays a dialog window containing a Web browser. The first page (or pages) of an interactive template returns an HTML form that solicits user input.
The first page of an interactive template starts with the <csp:StudioInteractiveTemplate> tag. The attributes of this tag are identical to those of the simple template tag. The final page (the one returning output to Studio) starts with the <csp:StudioGenerateTemplate> tag. Any intermediate pages (perhaps you are creating a multiple page wizard) do not need any special tags. The penultimate page contains a SUBMIT button that invokes the final page.
For example, suppose you want to create an interactive template, MyScript, that solicits script content and script type from a user and inserts a <script> tag into a CSP document. The first page, MyScript.csp, contains a simple HTML form:
<csp:StudioInteractiveTemplate name="MyScript" type="CSP">
<HTML>
<BODY>
<FORM NAME="form" ACTION="MyScript2.csp">
Language:
<SELECT NAME="language">
<OPTION VALUE="CACHE" SELECTED>CACHE
<OPTION VALUE="JavaScript">JavaScript
</SELECT>
<BR>
Script: <TEXTAREA NAME="script" ROWS="10" COLS="40"></TEXTAREA>
<BR>
<INPUT TYPE="submit" VALUE="OK" NAME="submit">
</FORM>
</BODY>
</HTML>
This CSP page contains:
-
A <csp:StudioInteractiveTemplate> tag specifying that this is an interactive template as well as the template's name and type.
-
An HTML form whose ACTION attribute links it to the final page of the template, MyScript2.csp (see below).
-
A SELECT control for specifying a script language.
-
A TEXTAREA control for entering the contents of the script.
-
A SUBMIT button that submits the contents of the form to the MyScript2.csp page.
The final template page, MyScript2.csp, uses the values submitted from the form to create a response that is sent back to Studio:
<csp:StudioGenerateTemplate>
<SCRIPT LANGUAGE="CACHE" RUNAT="SERVER">
    Write "<SCRIPT"
    Write " LANGUAGE=""",$G(%request.Data("language",1)),""""
    If ($G(%request.Data("language",1))="CACHE") {
        Write " RUNAT=""SERVER"""
    }
    Write ">",!
    Write $G(%request.Data("script",1)),!
    Write "<","/SCRIPT>",!
</SCRIPT>
This page starts with a <csp:StudioGenerateTemplate> tag and then includes ObjectScript code that sends back a SCRIPT tag (with appropriate attributes) to Studio. To test this, create a new CSP page and select Tools > Templates > MyScript. Enter some ObjectScript in the script box and select Ok. Script tags with your script are entered automatically into your new CSP page.
New Document Studio Templates
You can create a new document template by adding a mode attribute, with value of new, to either the <csp:StudioSimpleTemplate> or <csp:StudioInteractiveTemplate> tags.
Any template whose mode is new, appears, by name, in the New Document dialog (invoked by File > New). The results of the template are written into a newly created document.
For example, to create a new document template that creates new CSP pages, make a CSP file similar to this:
<csp:StudioSimpleTemplate name="MyCSPPage" type="CSP" mode="new">
<HTML>
<HEAD>
</HEAD>
<BODY BGCOLOR="FFDDFF">
<H1>New CSP Page</H1>
</BODY>
</HTML>
After saving this CSP file (you can save it under any CSP application) and compiling it, it appears in the Studio New dialog as MyCSPPage When selected, a new, untitled CSP document is created with the following contents:
<HTML>
<HEAD>
</HEAD>
<BODY BGCOLOR="FFDDFF">
<H1>New CSP Page</H1>
</BODY>
</HTML>
You can create more sophisticated New Document Templates by adding logic or by using an interactive template, as described above for Text Templates.
Parameters passed to the server in the %request object for a new document template are:
-
Project—name of the current Studio project.
-
Namespace—name of the namespace Studio is connected to.
-
User—name of the current Studio user.
-
Tabsize—Number of spaces a tab contains in the document.
New Class Definition Templates
If you are creating a New Document Template that creates a new class definition, you must perform an extra step in your template code: you tell Studio of the name of the new class so that it can create the correct internal data structures for the new class definition. This information is returned from the Template to Studio via data in the %session object's Data property stored under the subscripts Template and CLASS. At some point, your template should contain code similar to this:
<SCRIPT LANGUAGE="CACHE" RUNAT="SERVER">
    Set %session.Data("Template","CLASS") = classname
</SCRIPT>
Add Text to End of a Document
You can add text to end of a document template by setting an InsertAtEnd flag on the last page of either a Simple Template or an Interactive Template. If this flag evaluates to true (1), then studio inserts the template-generated text at the end of document for a non-class document or before the first <Storage> tag for a class document.
<SCRIPT LANGUAGE="CACHE" RUNAT="SERVER">
    Set %session.Data("Template","InsertAtEnd") = 1
</SCRIPT>
Add-in Studio Templates
You can create an add-in template by adding a mode attribute, with value of addin, to either the <csp:StudioSimpleTemplate> or <csp:StudioInteractiveTemplate> tags.
Any template whose mode is addin, appears, by name, in the Add-in dialog (invoked by the Tools > Add-in).
You can create Add-in Templates in the same manner as described above for Text Templates.
When invoking an add-in, Studio passes parameters to the server, where they are accessible, in the %request object. These parameters (which are case-sensitive) include the following:
-
Project—name of the current Studio project.
-
Namespace—name of the namespace Studio is connected to.
-
User—name of the current Studio user.
-
Document—name of the current document, if any.
-
SelectedText—selected text in the current document, if any.
Adding Items to a Project
From an Add-in Template, you can instruct Studio to add one or more items to the current project by using the inherited method, AddToProject, on the final page of the Add-in Template.
For example, the following adds a class, MyApp.MyClass, to the current project:
<SCRIPT LANGUAGE="CACHE" RUNAT="SERVER">
    Do ..AddToProject("MyApp.MyClass.CLS") // note .CLS extension
</SCRIPT>
Note that when adding an item to a project in this way, you must append the type of item (.CLS, .CSP, .MAC, and so on) to the item name. Also note that the item must exist before you add it to a project; adding a class to a project does not automatically create such a class (but, perhaps, your Add-in Template does this using the %Dictionary class provided in the class library).