

Using the SQL Explorer (2.13)
To help you make use of the tables in the system, InterSystems Data Studio™ provides the SQL Explorer. You can use this to examine tables, as well as run custom SQL queries.
Note that the user roles govern both the tables that you have permission to see and the SQL queries you have permission to run.
Understanding the SQL Explorer Interface
To access the SQL Explorer, click the SQL Explorer  icon in the application menu.
The SQL Explorer has the following areas:
-
The Schema Explorer on the left, which displays all the schemas and tables you have permission to see.
-
The query tabs at the top. Each query tab has its own query editor and, optionally, its own assistant. See Working with Query Tabs.
-
The query editor, where you type, paste, or upload SQL queries and run them. The toolbar above the query editor provides options such as Max Rows and Get Query Plan.
-
The tabs below the query editor:
-
Results—The output of the most recent query. See Viewing Query Output.
-
Query Plan—The cost and execution steps of the query.
-
History—Queries that you have run. See Rerunning a Query from History.
-
Saved—Queries that you have saved. See Saving a Query.
-
-
The chat pane on the right, which appears when the current query tab has an assistant. See Using an Assistant in the SQL Explorer. Assistants are only available with the Data Studio AI Assistant module.
You can collapse the Schema Explorer and the query editor to make more room for the other areas.
Working with Query Tabs
Each query tab has its own query and, if the tab has an assistant, its own chat session. The SQL Explorer keeps the query in each tab when you switch between tabs. By default, a query tab is named with the date and time that it was created. You can have up to 15 query tabs open.
To work with query tabs:
-
To create a query tab, click the + icon to the right of the query tabs. If you have access to more than one assistant with the Text-to-SQL agent, click the assistant you want to use with the new tab. See Using an Assistant in the SQL Explorer for more information.
-
To switch to a different query tab, click its name.
-
To rename a query tab, double-click its name, type the new name, and press Enter. To cancel, press Esc.
-
To close a query tab, click the close icon on the tab. You can close a tab only if more than one tab is open.
Viewing the Contents of a Schema
To view the contents of a schema:
-
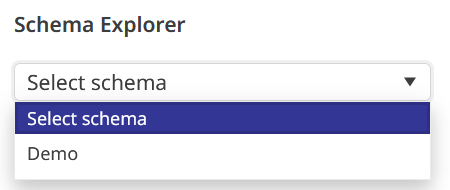
Click the Schema drop-down to expand it. The drop-down lists the schemas that you have permission to access. Click the schema you would like to view. The schema’s tables appear under the name of their data source.
For example:
-
Drag and drop a table name into the query editor.
An SQL SELECT query listing all the fields in the table appears in the box. For example:
SELECT * FROM Demo.mysample_data -
Click Run Query.
The system then executes the query. By default, the system shows data in display mode. For example, this means that a date field is shown in human-readable form and long values are truncated for readability.
You have the following additional options to refine what you see:
-
Select a different mode; the options are Display Mode (the default) and ODBC Mode.
-
Specify a different value for the Max Rows field, which limits how many rows of data to return from a query. By default, results are limited to 100 rows, but you can raise this limit (up to 5,000) by changing the value in the Max Rows field. (You can also limit the number of rows of data to return by using a TOP clause within the query.)
-
Edit the query, for example, by reordering or removing fields. Then click Run Query.
-
Enable rollbacks by selecting the Rollback on Script Error check box (it is cleared by default). When enabled, all statements in the script are rolled back if any statement fails.
-
Click Get Query Plan to view the query’s cost and execution steps in the Query Plan tab.
Viewing Fields in a Table
In addition to simply viewing the data, to see the fields that are available in any table that you have permission to see, click the Data Catalog Browser  icon to the left of the table name. You are redirected to the Data Catalog Browser. The field names are then shown as in the Schema Fields table.
Running a Custom Query
To run a custom query:
-
In the query editor, do one of the following:
-
Modify an existing query.
-
Type or paste a query.
-
Click Drag and drop .txt or .sql file here to upload a file containing your SQL code.
-
-
Click Run Query.
While the query runs, Run Query changes to Cancel Query. To stop the query, click Cancel Query.
The following statement types are supported:
-
CREATE
-
DROP
-
TRUNCATE TABLE
-
ALTER
-
INSERT
-
UPDATE
-
DELETE
-
SET OPTION
-
GRANT
-
REVOKE
You may run multiple SQL queries (up to 10,000 characters) at once. Separate statements with semicolons, either directly in the query editor or in the uploaded file. Statements are executed in order, regardless of whether any previous statements fail.
Viewing Query Output
Whether your query succeeds or fails, your output is displayed in the Results tab below the query editor.
If you would like to export your results, click Export. Your output is exported as a .xlsx file.
Rerunning a Query from History
To rerun a query that has been run previously within the current session:
-
Click History.
The page then displays a list of queries.
-
Drag the query into the query editor.
-
Click Run Query.
Saving a Query
To save a query:
-
Run the query in the query editor.
-
Click the History tab below the query editor.
-
In the row for the query, click the star icon.
The query appears in the Saved tab.

