
Defining Quality Measures
This page describes how to define quality measures for use in Business Intelligence. Quality measures are similar to calculated measures (see Defining Calculated Members).
For a comparison of quality measures with more basic Business Intelligence model elements, see Summary of Model Options.
Overview of Quality Measures
A quality measure is similar to a calculated measure that can be reused in multiple contexts. A quality measure is defined by a formula that combines MDX expressions. You specify the subject area or subject areas in which it is available, and you can control whether the quality measure is published (and thus available in the Analyzer).
Each quality measure is an InterSystems IRIS® data platform class definition, specifically a subclass of %DeepSee.QualityMeasure.QualityMeasureOpens in a new tab.
You can define quality measures either in the Quality Measure Manager or in an IDE. This page discusses the Quality Measure Manager.
You can use quality measures as follows:
-
Published quality measures are displayed in the Analyzer, in the Quality Measure section of the left area. You can drag and drop them into pivot tables.
-
You can use quality measures in MDX queries. To refer to a quality measure in MDX, use the following syntax:
[%QualityMeasure].[catalog/set/qm name]Where catalog is the catalog to which the quality measure belongs, set is a set in that catalog, and qm name is the short name of the quality measure. (The full name of the quality measure is catalog/set/qm name.)
You can also refer to a group (group name) in a quality measure as follows:
[%QualityMeasure].[catalog/set/qm name/group name]
Introduction to the Quality Measure Manager
The Quality Measure Manager displays all compiled quality measure classes in the given namespace. You can use it to create, modify, and delete them. To access the Quality Measure Manager:
-
In the Management Portal, select Analytics.
-
Select Tools > Quality Measures.
Here you can do the following:
-
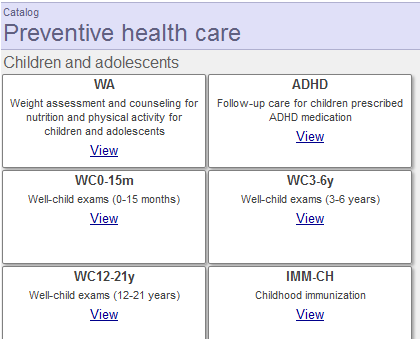
View summary information for the existing quality measures in this namespace. To do so, select Browse.
The middle area then displays something like the following:
-
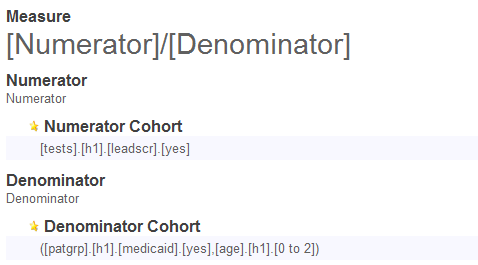
View the definition of a quality measure. To do so, select Open, expand the folders until you find the quality measure, and then select the measure. The middle area then displays the details, which includes a section that shows the definition of the measure. Typically this is as follows:
You can then edit the measure or remove it.
-
Create a quality measure. To do so, select New and then continue as described in the next section.
Creating a Quality Measure
To create a quality measure:
-
Select New.
The system displays a dialog box.
-
Specify the following values, which are all required:
-
For Catalog, either select an existing catalog or type a new catalog name.
-
For Set, either select an existing set or type a new set name.
-
For Name, type a name.
-
For Class Name for the Quality Measure, type a fully qualified class name (package and class).
-
-
Select OK.
The system closes the dialog box, and the middle area of the page now displays the initial definition of the quality measure, as follows:
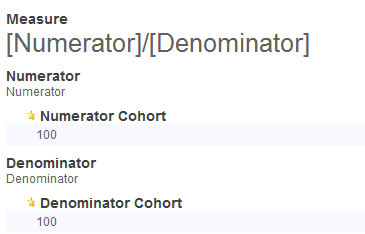
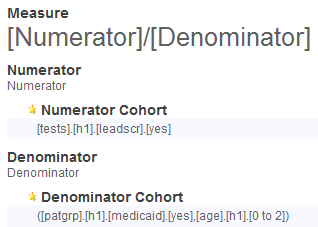
Every quality measure is expressed as a formula as shown here in the Measure field. In this case, the formula is:
[Numerator]/[Denominator]Where Numerator and Denominator are the names of groups defined in this quality measure.
Each group consists of one or more items, each of which is defined by an MDX expression.
In the initial definition of a quality measure, each of these groups is defined as a constant (100). The initial value of this quality measure is 1.
The bottom area of the page displays any additional information:
-
Select Edit.
Now you can modify the formula and make other changes. See the following sections.
-
When you are done, select either Save to save the definition or select Save As to save it with a new name.
When you save the definition, the system automatically compiles the class and writes the quality measure definition into a system global.
Specifying the Expression for a Quality Measure
Except for linked quality measures, when you display a quality measure in edit mode, you can edit the overall expression, which looks like this initially:
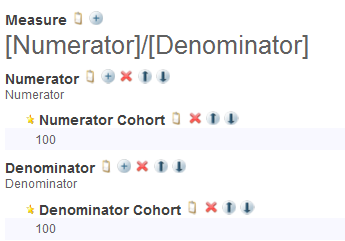
Here you can do the following:
-
Change the overall expression. To do so, select the edit button
 . Then specify a new expression and select OK. In your formula:
-
Use square brackets around the name of any group that is used in the formula. For example, use [Numerator] to refer to the Numerator group, if your quality measure defines such a group.
-
Use any of the standard mathematical operators.
-
Include numeric constants as needed.
-
Include parentheses to control precedence as needed.
-
-
Add a group. To do so, select the add button
 next to the Measure heading. Then edit the new group, which is added to the end of definition.
 -
Edit a group. To do so, select the edit button
. Then specify new values for Name and Description as needed, and select OK.
-
Add an element to a group. To do so, select the add button
next to the group name. Then edit the new element. -
Edit a element in a group. To do so, select the edit button
next to the element name. Then specify new values for Name and MDX Expression as needed, and select OK.![The current element has the name Numerator Cohort and an MDX expression of [tests].[h1].[leadscr].[yes].](images/d2modadv_qm_element_edit.png)
For MDX Expression, see Allowed MDX Expressions.
-
Change the order of groups within the measure definition or change the order of elements within a group. To do so, select the up and down arrow next to the item that you want to move.
-
Delete a group or an element. To do so, select the X button next to the item you want to delete. The system prompts you to confirm this action.
Allowed MDX Expressions
For MDX Expression, specify one of the following kinds of expressions:
-
A reference to a member, as shown in the example. This is the most common kind of expression used in quality measures. A member is a set of records, and a quality measure usually consists of comparisons between different sets of records.
-
Most other kinds of member expressions.
-
Numeric literals such as 42 and other kinds of numeric expressions. You can, for example, use functions such as AVG and COUNT.
-
String literals such as "my label" and some other kinds of string expressions. The PROPERTIES and IIF functions are not supported here.
MDX Expression cannot be a set expression. You can, however, use %OR to enclose a set and return it as a single member.
Search expressions are not supported within quality measures.
For information on creating MDX expressions, see Using InterSystems MDX and the InterSystems MDX Reference.
How Groups and Elements Are Combined
The formula for the quality measure (shown below the Measure heading) determines how the groups are combined.
Within any given group, the elements are combined as an MDX set (that is, they are combined via logical OR). If you need to combine elements via logical AND, create one element that has an MDX tuple expression that combines the desired pieces. For example: ([patgrp].[h1].[medicaid].[yes],[age].[h1].[0 to 2])
To compute the value for a quality measure in any given context, Business Intelligence does the following:
-
For each group, creates an MDX set expression that combines the elements in that group.
-
Evaluates each group and determines its value.
-
Combines the group values as given in the formula.
Note that a quality measure can define groups that are not used by the formula. This can be useful if you are using the special [%QualityMeasure] dimension to refer to groups, as described earlier in this page.
Editing Other Information for a Quality Measure
When you display a quality measure in edit mode, you can also edit Caption (at the top of the page), as well as the following area at the bottom of the page:

Here you can do the following:
-
Edit an item. To do so, select the edit button
next to that item and then specify the details. -
Add an item. To do so, select Add Meta Item.
The editable items here are as follows:
-
Subject Area — Specifies the cube or subject area in which this quality measure is available.
To specify multiple cubes or subject areas, edit the quality measure class in an IDE.
Note that the quality measure is automatically available in any subject areas that are based on any cubes in this list.
-
Published — Specifies whether this quality measure is available in the Analyzer.
-
Link to additional info — Specifies a link to a URL that contains any additional information.
-
Your custom items — Specify any additional information to display in the Quality Measure Manager. The system does not use these items.
Defining a Linked Quality Measure (Quality Measure Alias)
A linked quality measure is an alias for another quality measure (the master measure). The master measure may or may not be published, and can belong to a different subject area.
To define a linked quality measure:
-
Select New.
The system displays a dialog box.
-
Specify the following values, which are all required:
-
For Catalog, either select an existing catalog or type a new catalog name.
-
For Set, either select an existing set or type a new set name.
-
For Name, type a name.
-
For Class Name for the Quality Measure, type a fully qualified class name (package and class).
-
-
Select OK.
The system closes the dialog box, and the middle area of the page now displays the initial definition of the quality measure.
-
Select Edit.
-
For Linked To, select the parent measure and select OK.
If you specify Linked To for an existing quality measure, the editor discards values for any optional properties of the measure.
-
Optionally specify the following options:
-
Caption
-
Subject Area
-
Published
Other options are inherited from the master measure.
-
-
When you are done, select either Save to save the definition or select Save As to save it with a new name.
When you save the definition, the system automatically compiles the class and writes the quality measure definition into a system global.
Checking the Expression for a Quality Measure
You might want to check the overall expression that defines a quality measure, particularly if the definition is complex. To do so, use the %GetExpression instance method of the quality measure. For example:
SAMPLES>set qm=##class(QM.Preventive.Child.QM7).%New()

SAMPLES>w qm.%GetExpression()
[tests].[h1].[leadscr].[yes]/([patgrp].[h1].[medicaid].[yes],[age].[h1].[0 to 2])
This is the expression for the following quality measure:
Deleting a Quality Measure
To delete a quality measure:
-
Display its definition.
-
Select Remove.
-
Select OK.