
Create the Projection for FHIR SQL Builder
The final step is to create a data Projection:
-
Click New on the right side of the Projections pane to open the New Projection dialog.
Fill out this dialog as follows:
-
FHIR Repository – The repository to use for this projection. This drop-down menu includes the names of the repositories added when creating a new Analysis.
-
Transformation Specification – The specification used to create this projection.
-
Package Name – A name for the package the SQL tables will be put in.
-
-
Click Launch Projection to create the projection.
Once you have created the projections, columns provide the following information:
-
FHIR Repository – The name of the FHIR repository on which the projection is based.
-
Transformation Specification – The transformation specification that the projection is based on.
-
Namespace – The namespace that the projection will be stored in.
-
Package Name – The package that the projection will be stored in.
-
Actions – Provides buttons you can use to manage the specification.
-
 Link – Opens the SQL Explorer page of the Management Portal (Home > System Explorer > SQL).
 -
 Update – Updates the projection to reflect changes in the underlying transformation specification.
 -
 Delete – Deletes the projection.
-
-
-
Click the Link action to open the SQL Explorer page in the Management Portal.
-
On the SQL Explorer page, enter the package name you specified when you created the projection into the Filter field in the upper left-hand corner of the page.
Your projections will appear under Tables on the left.
-
Drag the table to the Execute Query tab, as shown:
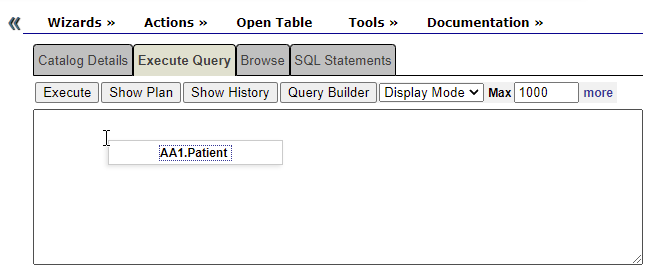
-
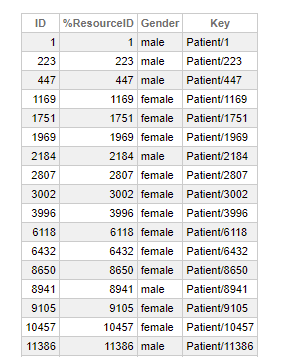
Execute the query. The table will appear below.
A system task called IndicesTask is created on the FHIR Repository if the system shuts down while indexes are being built. This task will resume building indexes when the system starts up again.