
System Management and Security
System Management and Security
This page covers access to the InterSystems IRIS® data platform Management Portal, and other security-related features of the Portal.
Manage InterSystems IRIS Security Domains
InterSystems security domains provide a grouping of users that corresponds to Kerberos realms and Windows domains. If your instance is using Kerberos, its InterSystems IRIS domain corresponds to a Kerberos realm. If you are using a Windows domain, this also corresponds to a Kerberos realm.
While a security domain name often takes the form of an Internet domain name, there is no requirement that it do so. A security domain name can contain any character except the at sign (@).
Single and Multiple Domains
InterSystems IRIS supports the use of either a single-domain or multiple-domains.
To specify support for a single domain or multiple domains, use the Allow multiple security domains field of the System-wide Security Parameters page of the Management Portal (System Administration > Security > System Security > System-wide Security Parameters), described in the System-wide Security Parameters section.
For an instance with a single domain:
-
The $USERNAME variable does not include the domain name.
-
System utilities do not show the domain name when displaying usernames.
-
It is prohibited to specify a username from any domain other than the default domain (described in the following section).
For an instance with multiple domains:
-
The $USERNAME variable includes the domain name.
-
System utilities show the domain name when displaying usernames. This includes the Users page (Security Administration > Security > Users).
-
Users log in with their fully qualified name on their domain, such as documentation@intersystems.com. If there are two accounts that share the initial portion of the fully qualified name and where the domain names differ, then these are stored as two separate user accounts (where each has its own attributes and these attributes can have differing values).
-
You cannot edit usernames.
The Default Security Domain
Each instance has a default security domain. This is the domain assumed for any username where no domain is specified. For example, if the default domain is “intersystems.com”, the user identifiers “info” and “info@intersystems.com” are equivalent. When InterSystems IRIS is installed, it uses the local domain name to provide an initial value for the parameter.
For instances with multiple security domains, you can select a new default security domain using the Default Security Domain field of the System-wide Security Parameters page (System Administration > Security > System Security > System-wide Security Parameters), described in the System-wide Security Parameters section.
List, Create, Edit, and Delete Security Domains
The LDAP Configurations page lists an instance’s existing security domains and configurations, allows you to create domains and configurations, and allows you to modify or delete existing ones.
List Security Domains
To see the list of an instance’s domains, go to the Security LDAP Configurations page (System Administration > Security > System Security > LDAP Configurations). For each domain, the page displays:
-
Login Domain Name — The domain’s name. Click this to edit the domain’s properties.
-
LDAP Enabled — Whether or not LDAP connections are enabled for this domain.
-
Description — The domain’s description.
-
A Delete link — After confirmation, removes a domain from the instance.
If Kerberos is enabled for an instance, the menu choice that gets to this page is LDAP/Kerberos Configurations. The name of the page is Security LDAP/Kerberos Configs.
Create a Security Domain
To create a domain for the instance to use, create an LDAP configuration that specifies that domain; creating the LDAP configuration creates the domain:
-
Go to the Security LDAP Configurations page (System Administration > Security > System Security > LDAP Configurations).
-
Click the Create New LDAP configuration button. Selecting this displays the Edit LDAP configuration page.
-
On the Edit LDAP configuration page, enter the Login Domain Name and an optional description.
-
Then enter values for other configuration fields and click Save to create the configuration and the domain.
If Kerberos is enabled for an instance, the menu choice that gets to this page is LDAP/Kerberos Configurations. The name of the page is Security LDAP/Kerberos Configs.
Edit a Security Domain
To edit a domain:
-
Go to the Security LDAP Configurations page (System Administration > Security > System Security > LDAP Configurations).
-
Click Login Domain Name to edit a domain’s and its configuration fields.
-
Click Save to save the modified configuration and domain.
-
You cannot modify a domain’s name. You can alternately create a new domain with the preferred name and then delete an existing domain.
-
If Kerberos is enabled for an instance, the menu choice that gets to this page is LDAP/Kerberos Configurations. The name of the page is Security LDAP/Kerberos Configs.
Delete a Security Domain
To delete a domain:
-
Go to the Security LDAP Configurations page (System Administration > Security > System Security > LDAP Configurations). This displays a list of domains.
-
Click Delete in the domain’s row.
-
Confirm the deletion.
If Kerberos is enabled for an instance, the menu choice that gets to this page is LDAP/Kerberos Configurations. The name of the page is Security LDAP/Kerberos Configs.
Password Strength and Password Policies
InterSystems IRIS allows you to specify requirements for user passwords by supplying a string of the form:
X.Y[ANP]
where
-
X is the minimum number of characters in the password.
-
Y is the maximum number of characters in the password.
-
A, N, and P specify whether Alphabetic characters, Numeric characters, and Punctuation characters are permitted in the password.
These rules are based on the ObjectScript pattern matching functionality. This functionality is described in Pattern Matching.
The value for this parameter does not affect existing passwords.
Suggested Administrator Password Strength
Ideally, administrator passwords should be a random mixture of uppercase and lowercase alphabetic characters, numerals, and punctuation. InterSystems strongly recommends a minimum password length of 12 such random characters.
Emergency Access
InterSystems IRIS provides a special emergency access mode that can be used under certain dire circumstances, such as if there is severe damage to security configuration information or if no users with the %Admin_Manage:Use or %Admin_Secure:Use privileges are available (that is, if all users are locked out). Although InterSystems IRIS attempts to prevent this situation by ensuring that there is always at least one user with the %All role, that user may not be available or may have forgotten the password.
To obtain emergency access to an instance of InterSystems IRIS, you must either have root or administrator privileges where the instance is running (if it was installed by root) or be the user who installed the instance (if it was not installed by root). This requirement limits emergency access to users who already have sufficient privileges to perform administrative operations on the instance, such as installing a new instance over the existing one.
Emergency access topics:
How Emergency Access Mode Works
When InterSystems IRIS is running in emergency access mode, only a single user (called the emergency user) is permitted. This username does not have to be previously defined within InterSystems IRIS. If the instance already has a user account with the same username as the emergency user, then the emergency user has the privileges associated with emergency access mode instead of the privileges for the existing standard user account.
The emergency user account and password are only valid for the single invocation of emergency mode. If the username specified for the emergency user is a previously defined username within your InterSystems IRIS instance, restarting the system into its normal mode restores the original password and security privileges for that user account. If the username specified for the emergency user is new, InterSystems IRIS saves the login credentials and security privileges for this new user when it restarts into its normal mode, though the user account is disabled.
To prevent the accumulation of dormant accounts with the %ALL role registered in your InterSystems IRIS instance, we recommend using previously defined usernames for the emergency user instead of new usernames. This also allows systems with multiple administrators to track the authorship of changes made while in emergency access mode via the logs, if each administrator initializes emergency access mode using their own username.
In emergency access mode, InterSystems IRIS has the following constraints and behaviors:
-
The emergency user is the only permitted user. Any attempt by another user to log in will fail. The emergency user has the %ALL role.
-
There is only access using Instance Authentication — no other authentication mechanism is supported. Two-factor authentication is disabled. This avoids any situation where two-factor authentication might prevent the emergency user from being able to authenticate.
-
For the web applications that control the Portal (/csp/sys and /csp/sys/*), the standard login page (%CSP.Login.cls) is used during emergency access even if there is a custom login page available; this ensures that the emergency user has access to the Portal, since a custom login page may prevent authentication from occurring. For other web applications, if there is a custom login page, then that page is used during emergency login.
-
After emergency access login, InterSystems IRIS attempts to audit all events for the active process; InterSystems IRIS start-up proceeds even if this is not possible. Login failures in emergency access mode are not audited.
-
Console, Terminal, and Web Gateway (%Service_Console, %Service_Terminal, and %Service_WebGateway) are the only services that are enabled. All other services are disabled. This does not affect the enabled or disabled status of services when InterSystems IRIS starts in non-emergency mode; only the current (emergency), in-memory information about services is affected.
-
For the enabled services, only authenticated access is permitted. InterSystems IRIS uses its own password authentication for the services, where the emergency access username and password must be used.
-
The emergency user can make changes to the InterSystems IRIS configuration, but these changes are not activated until the next time that InterSystems IRIS is started in normal (not emergency) mode. This is in contrast to the normal operation of InterSystems IRIS, in which configuration changes are primarily activated without restarting InterSystems IRIS.
Invoke Emergency Access Mode on Windows
To start InterSystems IRIS in emergency access mode, the user must be a member of the Administrators group. Then, do the following:
-
Start a command prompt, running it as an administrator. This can either be:
-
The Windows Command Prompt program. Right-click the Command Prompt choice in the menu and then choose Run as Administrator.
-
The Windows PowerShell. While you can run this as either an administrator or a user without extra privileges, this procedure assumes that you are running as an administrator; to run as a user without extra privileges, use the -verb runas argument when you invoke the command, which is described in PowerShell documentation.
-
-
Go to the bin directory for your InterSystems IRIS installation.
-
In that directory, invoke InterSystems IRIS at the command line using the appropriate switch and passing in the username and password for the emergency user. This depends on the command prompt that you are using:
-
For the Windows Command prompt, the command is:
iris start <instance> /EmergencyId=<username>,<password>This starts an emergency-mode InterSystems IRIS session with only one allowed user where:
-
<instance> specifies the instance being started in emergency mode
-
<username> is the sole user of the system
-
<password> is that user’s password
-
-
For the Windows PowerShell, the command is:
start-process .\iris.exe -ArgumentList "start <instance> /EmergencyId=<username>,<password>"This starts an emergency-mode InterSystems IRIS session with only one allowed user where:
-
<instance> specifies the instance being started in emergency mode
-
<username> is the sole user of the system
-
<password> is that user’s password
-
Note:On Windows, unlike other operating systems, the EmergencyId switch is preceded by a slash (“/”).
For example, at the instance MyIRIS, to start InterSystems IRIS in emergency mode with user jmd with the password purple22, the command would be:
iris start MyIRIS /EmergencyId=jmd,purple22The only user who can then log in is the emergency user, using the appropriate password, such as:
Username: jmd Password: ******** Warning, bypassing system security, running with elevated privileges -
Once InterSystems IRIS has started, you can start the Terminal from the InterSystems IRIS launcher or run any web application. This provides access to the Management Portal and all character-based utilities. Using this access, you can change any settings as necessary and then restart InterSystems IRIS in its normal mode.
Invoke Emergency Access Mode on UNIX®, Linux, and macOS
To start InterSystems IRIS in emergency access mode, you must either have root access or be the owner of the instance. Invoke InterSystems IRIS at the command line using the appropriate switch and passing in the username and password for the emergency user:
./iris start <instance-name> EmergencyId=<username>,<password>
This starts an emergency-mode InterSystems IRIS session with only one allowed user where:
-
<instance-name> specifies the instance being started in emergency mode
-
<username> is the sole user of the system
-
<password> is <username>’s password
If going from one of these operating systems to Windows, remember that on Windows only, the EmergencyId switch is preceded by a slash (“/”).
For example, at the instance MyIRIS, to start InterSystems IRIS in emergency mode with user jmd with the password purple22, the command would be:
./iris start MyIRIS EmergencyId=jmd,purple22
The only user who can then log in is the emergency user, using the appropriate password, such as:
Username: jmd
Password: ********
Warning, bypassing system security, running with elevated privileges
Once InterSystems IRIS has started, you can run the Terminal or any web application. This provides access to the Management Portal and all character-based utilities. Using this access, you can change any settings as necessary and then restart InterSystems IRIS in its normal mode.
System Security Settings Page
The System Security Settings page (System Administration > Security > System Security) provides links to pages that configure the entire InterSystems IRIS® instance for security. These pages are:
System-Wide Security Parameters
This topic describes security issues that affect an entire InterSystems IRIS instance. This includes the system-wide security parameters and handling sensitive data in memory images.
InterSystems IRIS includes a number of system-wide security parameters. You can configure these on the System Security Settings page (System Administration > Security > System Security > System-wide Security Parameters). These are:
-
Enable audit — Turns auditing on or off. This check box performs the same action as the Enable Auditing and Disable Auditing links on the Auditing page (System Administration > Security > Auditing). For more information on auditing, see Auditing Guide. [Default is off]
-
Freeze system on audit database error — (Only available when auditing is enabled.) Stops (freezes) the instance if there is an error writing to the audit database. For more information, see Freezing the System If It Is Impossible to Write to the Audit Database.
-
Enable configuration security — Specifies whether configuration security is on or off, as described in Configuration Security. [Default is off]
-
Default security domain — Allows you to choose the instance’s default security domain. For more information on security domains, see the section Manage InterSystems IRIS Security Domains. [Default is the domain established during installation]
-
Inactive limit (0–365) — Specifies the maximum number of days that a user account can be inactive, which is defined as the amount of time between successful logins. When this limit is reached, the account is disabled. A value of 0 (zero) means that there is no limit to the number of days between logins. [Default is described in Initial User Security Settings.] This limit does not apply to LDAP and Delegated user types.
Note:Mirror Members automatically set the InactiveLimitOpens in a new tab parameter to 0 on startup. This prevents user accounts from becoming inactive on other mirror members.
-
Invalid login limit (0-64) — Specifies the maximum number of successive unsuccessful login attempts. After this limit is reached, the behavior depends on the login method:
-
Terminal — An escalating time delay is imposed on each attempt.
-
CSP — Attempts within 2 seconds of the previous attempt are automatically rejected and InterSystems IRIS responds to the client with 503 Service Unavailable. These rejections are not audited.
-
Web — The message User Unauthorized is displayed.
A value of 0 (zero) means that there is no limit to the number of invalid logins. [Default is 5]
-
-
Disable account if login limit reached — If checked, specifies that reaching the number of invalid logins (specified in the previous field) causes the user account to be disabled.
-
Password Expiration Days (0–99999) — Specifies how frequently passwords expire and, therefore, how frequently users must change their passwords (in days). When initially set, specifies the number of days until passwords expire. A value of 0 (zero) means that the password never expires; however, setting this field to 0 does not affect users for whom the Change Password on Next Login field has been set. [Default is 0]
Caution:This setting affects all accounts for the InterSystems IRIS instance, including those used by InterSystems IRIS itself. Until passwords are updated for these accounts, it may be impossible for various operations to proceed and this may lead to unexpected results.
-
Password pattern — Specifies the acceptable format of newly created passwords. See Password Strength and Password Policies for more information. [Default is described in Initial User Security Settings.]
-
Password validation routine — Specifies a user-provided routine (or entry point) for validating a password. See the PasswordValidationRoutine property in the Security.SystemOpens in a new tab class for more information.
-
Role required to connect to this system — If set to an existing role, specifies that a user must be a member of this role (as a login role) in order to log in to the system.
If you are using LDAP authentication or OS-based LDAP authorization, InterSystems strongly recommends that you create a role that is required to connect and that you specify its name in this field. For more information, see Setting Up a Role Required for Login.
-
Enable writing to percent globals — Specifies whether write access to percent globals is implicitly granted to all users; if not checked, write access is controlled by normal security mechanisms. For more information on the percent globals and IRISSYS (the database that holds them), see IRISSYS, the Manager’s Database. [Default is controlled by normal security mechanisms.]
-
Allow multiple security domains — Specifies whether there is support for multiple InterSystems security domains. For more information on security domains, see the section Manage InterSystems IRIS Security Domains. [Default is a single domain]
-
Telnet server SSL/TLS Support — Specifies if the telnet server supports or requires the use of TLS for client connections.
Important:Before you can configure the telnet server to use TLS, there must be an existing configuration called %TELNET/SSL. For more information about using TLS with the InterSystems IRIS telnet server, see “Configure the InterSystems IRIS Telnet Server to use TLS.”
Options are:
-
Disabled — The telnet server refuses client connections that use TLS. (That is, it only accepts client connections that do not use TLS.)
-
Enabled — The telnet server accepts client connections that use TLS but does not require them.
-
Required — The telnet server requires client connections to use TLS.
-
-
Default signature hash — Specifies the algorithm used by default to create an XML signature hash. For more information on the supported algorithms for creating hashes, see https://www.w3.org/Opens in a new tab.
-
Escalated Login Timeout — Specifies the amount of time, in seconds, a user with an escalated role can be inactive before being prompted to reauthenticate. [Default is 300]
-
Escalated Authentication Timeout — Specifies the amount of time after a successful authentication, in seconds, that users can use role escalation without reauthenticating. Exiting role escalation bypasses this parameter; the next escalation attempt will always prompt for reauthentication. If set to 0, users must authenticate for each escalation attempt. [Default is 0]
Authentication Options
The Authentication/Web Sessions Options page (System Administration > Security > System Security > Authentication/Web Options) allows you to enable or disable authentication mechanisms for the entire InterSystems IRIS instance:
-
If an authentication mechanism is disabled for the entire InterSystems IRIS instance, then it is not available for any service.
-
If an authentication mechanism is enabled for the entire InterSystems IRIS instance, then it is available for all the services that support it. To enable the authentication mechanism for a particular service, use the Edit Service page for that property; this page is available by selecting the service from the Services page (System Administration > Security > Services).
Note:Not all services support all mechanisms.
The authentication options are:
-
Allow Unauthenticated access — Users may connect without authenticating. (If login dialog appears, the user can leave the Username and Password fields blank and click OK to log in.)
-
Allow O/S authentication — InterSystems IRIS uses the operating system’s user identity to identify the user; it then uses InterSystems authorization.
-
Allow O/S authentication with Delegated authorization — InterSystems IRIS uses the operating system’s user identity to identify the user; it then uses delegated authorization.
-
Allow O/S authentication with LDAP authorization — InterSystems IRIS uses the operating system’s user identity to identify the user; it then uses LDAP authorization.
-
Allow Password authentication — InterSystems IRIS uses its own native tools, called instance authentication, to authenticate the user; it then uses InterSystems authorization.
-
Allow Delegated authentication — InterSystems IRIS uses external (delegated) authentication system by calling out to it. You can use delegated authentication with either InterSystems authorization or delegated authorization.
-
Always try Delegated authentication — InterSystems IRIS invokes delegated authentication code for users authenticating with instance authentication (also known as password authentication). If you use both delegated authentication and instance authentication and also require that ZAUTHENTICATE be called for instance authentication users, then select this option.
-
Allow Kerberos authentication — InterSystems IRIS performs authentication using Kerberos. You can use Kerberos authentication with either InterSystems authorization or delegated authorization.
-
Allow LDAP authentication — InterSystems IRIS uses LDAP (including Active Directory) to authenticate users. You can use LDAP for both authentication and authorization.
-
Allow LDAP cache credentials authentication — InterSystems IRIS uses a copy of cached LDAP credentials to authenticate LDAP users if the LDAP database becomes unavailable.
-
Allow creation of Login Cookies — InterSystems IRIS uses cookies that are shared among enabled web applications to authenticate users, so that they do not need to enter a username and password when first using a new application. This is only relevant for web applications that use CSP.
-
Login Cookie expire time (secs) — The duration of a login cookie, in seconds. This field is only relevant if login cookies are enabled for the instance.
-
Allow Two-factor Time-based One-time Password authentication — InterSystems IRIS provides a verification code via an authentication device or an app that runs on the user’s phone; the user then enters the code to complete the authentication process. If selected, the Authentication/Web Session Options page displays the fields for configuring two-factor authentication.
-
Allow Two-factor SMS text authentication — InterSystems IRIS provides a security code via a mobile phone text message; the user then enters the code to complete the authentication process. If selected, the Authentication/Web Session Options page displays the fields for configuring two-factor authentication.
If there are multiple supported authentication options, InterSystems IRIS uses cascading authentication.
Effect of Changes
When you make changes to various security settings, the amount of time for these to take effect are as follows:
-
Changes to user properties, such as the roles assigned to the user, are effective with the next login for that user. They have no effect on processes that are already running.
-
Changes to services, such as whether a service is enabled or authentication is required, are effective for future connection attempts. Existing connections are not affected.
-
Changes to role definitions are effective immediately for any subsequent privilege checks. These affect database resources immediately, because they are checked for each database access. For services and applications, they are effective with subsequent connection attempts or application initiations.
The times listed here are the latest times that changes take effect; in some cases, changes may be effective earlier than indicated.
Enabling Automatic Refreshes of Management Portal Pages
By default, users can refresh Management Portal pages only by clicking the  (Refresh the diagram) icon where it is available. You can expose a feature in the Management Portal that lets users enable and configure automatic refresh of Management Portal pages.
-
To expose this setting from the Terminal, set the following global to 1 (enabled) or 0 (disabled, default):
SET ^%SYS("Portal","EnableAutoRefresh") = 1 -
To expose this feature from the Management Portal, go to Interoperability > Manage > Configuration > Interoperability Settings and select Permit Enabling Automatic Refresh of Management Portal Pages.
If you expose this feature, a set of radio buttons appears on Management Portal pages that can be refreshed. Users can use this to turn automatic refreshes on and off (default). On some pages, users can specify the refresh interval.
The following image shows the Classes page when automatic refreshes have been enabled and the refresh interval has been set to 15 seconds:
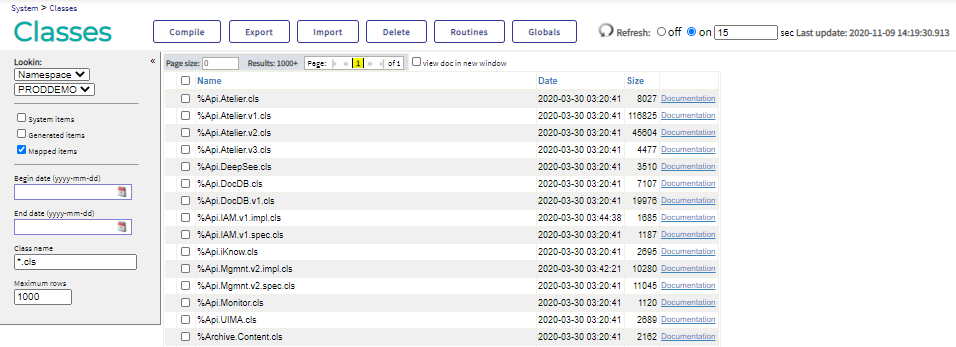
An automatic refresh constitutes a call to the InterSystems IRIS server and can prevent automatic logouts if they are enabled. For more information, see Automatic Logout Behavior in the Management Portal.
Automatic Logout Behavior in the Management Portal
Each InterSystems IRIS Management Portal web application has a Session Timeout property that determines the length of time that users can remain inactive before their sessions expire. By default, fifteen seconds after a user’s session expires, the Management Portal refreshes the current page and logs the user out. The Management Portal does not cache pending changes or prompt the user to save pending changes. Unsaved changes are discarded.
Inactivity is the time between calls to the InterSystems IRIS server. Not all user actions constitute a call to the server. For example, a user clicking Save constitutes a call to the server, but a user typing in a text field does not. Consequently, if a user is editing a data transformation, but does not click Save for longer than Session Timeout threshold, then the user’s session expires and any unsaved changes are discarded.
After an automatic logout, the following scenarios may occur:
-
The login page appears.
-
The Management Portal logs the user out and then immediately logs the user in again because the web application has a Group By Id value that results in automatic authentication. In this case, the current Management Portal page appears refreshed and any pending changes are removed.
You can take the following steps to prevent users from losing work:
-
Remind users to save their work on a regular basis.
-
Extend the Session Timeout value for web applications where users are performing time-intensive configuration tasks such as modifying data transformations. The default Session Timeout value is 15 minutes.
Additionally, while InterSystems recommends that you retain the default automatic logout behavior, you can allow users to remain logged in until they actively log out or close their browsers when they are on Interoperability pages in the Management Portal:
-
To change this setting from the Terminal, set the following global to 1 (disable automatic logout) or 0 (enable automatic logout, default):
SET ^EnsPortal("DisableInactivityTimeout","Portal") = 1 -
To change this setting from the Management Portal, go to Interoperability > Manage > Configuration > Interoperability Settings and select the Disable Inactivity Timeout for Interoperability Pages.
This is a per-namespace setting. To modify logout behavior, you must set this value for each namespace individually.
InterSystems recommends that you consider the possible security implications before you make any changes.
For more information about web applications and their settings, see Defining Applications.
Other Security Features
This section describes several additional security features and considerations. These are:
The following cover additional security topics:
Enable Use of the Secure Debug Shell
InterSystems IRIS includes the ability to suspend a routine and enter a shell that supports full debugging capabilities (as described in Command-line Routine Debugging). InterSystems IRIS also includes a secure debug shell, which has the advantage of ensuring that users are prevented from exceeding or circumventing their assigned privileges.
By default, users at the debug prompt maintain their current level of privileges. To enable the secure shell for the debug prompt and thereby restrict the commands that the user may issue, the user must hold the %Secure_Break:Use privilege (the Use permission for the %Secure_Break resource). To give a user this privilege, make the user a member of a role which includes the %Secure_Break:Use privilege, such as the predefined %SecureBreak role.
Protect Sensitive Data in Memory Images
Certain error conditions can cause the contents of a process’s memory to be written to a disk file, known as a “core dump.” This file contains copies of all data that was in use by the process at the time of the dump, including potentially sensitive application and system data. This can be prevented by disallowing core dumps on a system-wide basis. The method for disallowing core dumps varies according to the operating system in use; for details, consult the documentation of your operating system.