
Defining Named Filters
Defining Named Filters
A named filter is saved with the subject area. You can use it in multiple pivot tables and in filter controls on dashboards.
To define a named filter:
-
Make sure that no named filter is currently selected.
-
Click the Named Filter button
 in the Model Contents pane.
 -
For Filter Name, type a user-friendly filter name.
-
For Description, type an optional description.
The rest of the dialog box is the same as the Advanced Filter Editor.
-
For details on the rest of this dialog box, see Adding Advanced Filters, earlier in this page.
When you are done, the Model Contents pane displays the filter within the Named Filters section.
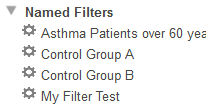
Because a named filter can be relatively complex, it can be useful to define appropriate named filters for use on dashboards. If you do this, users of the dashboards can filter their data more easily.